Video SDK UI Toolkit
The Zoom Video SDK UI Toolkit is a prebuilt video chat user interface powered by the Zoom Video SDK.
The UI Toolkit enables you to instantly start using a core set of Video SDK features in your app, including:
| Video | Audio | Other |
|---|---|---|
| Video selection, front or back camera, video on or off | Mute & unmute | Session & 1-on-1 chat |
| Active speaker & gallery view | Mic & speaker selection | Join & leave sessions, session details, host & manager controls |
| Virtual background | Portrait & landscape support | |
| Full-screen sharing | Cloud Recording & live streaming | |
| Video preview | Audio preview | Live transcription & translation |
| CRC & PSTN call in information and call out invite |
The use of this UI Toolkit is subject to the Video SDK terms of service.
The UI Toolkit for iOS does not currently support SwiftUI.
UI Toolkit on GitHub
Prerequisites
- Xcode
- A physical 64-bit iOS device (iPhone or iPad) with iOS version 15.0 or above.
- Versions 1.11.0-1 and later follow Apple's requirement to provide a privacy manifest and signatures.
- A validated provisioning profile certificate.
- A Video SDK developer account with credentials.
Install
Install the UI toolkit through the Swift Package Manager or Cocoapods.
Access the toolkit on GitHub at https://github.com/zoom/videosdk-ui-toolkit-ios.git.
In Swift Package Manager, use the main branch to get the latest Video SDK UI Toolkit version. You can select a specific version based on your needs, but we strongly recommend using the main branch to stay up-to-date.
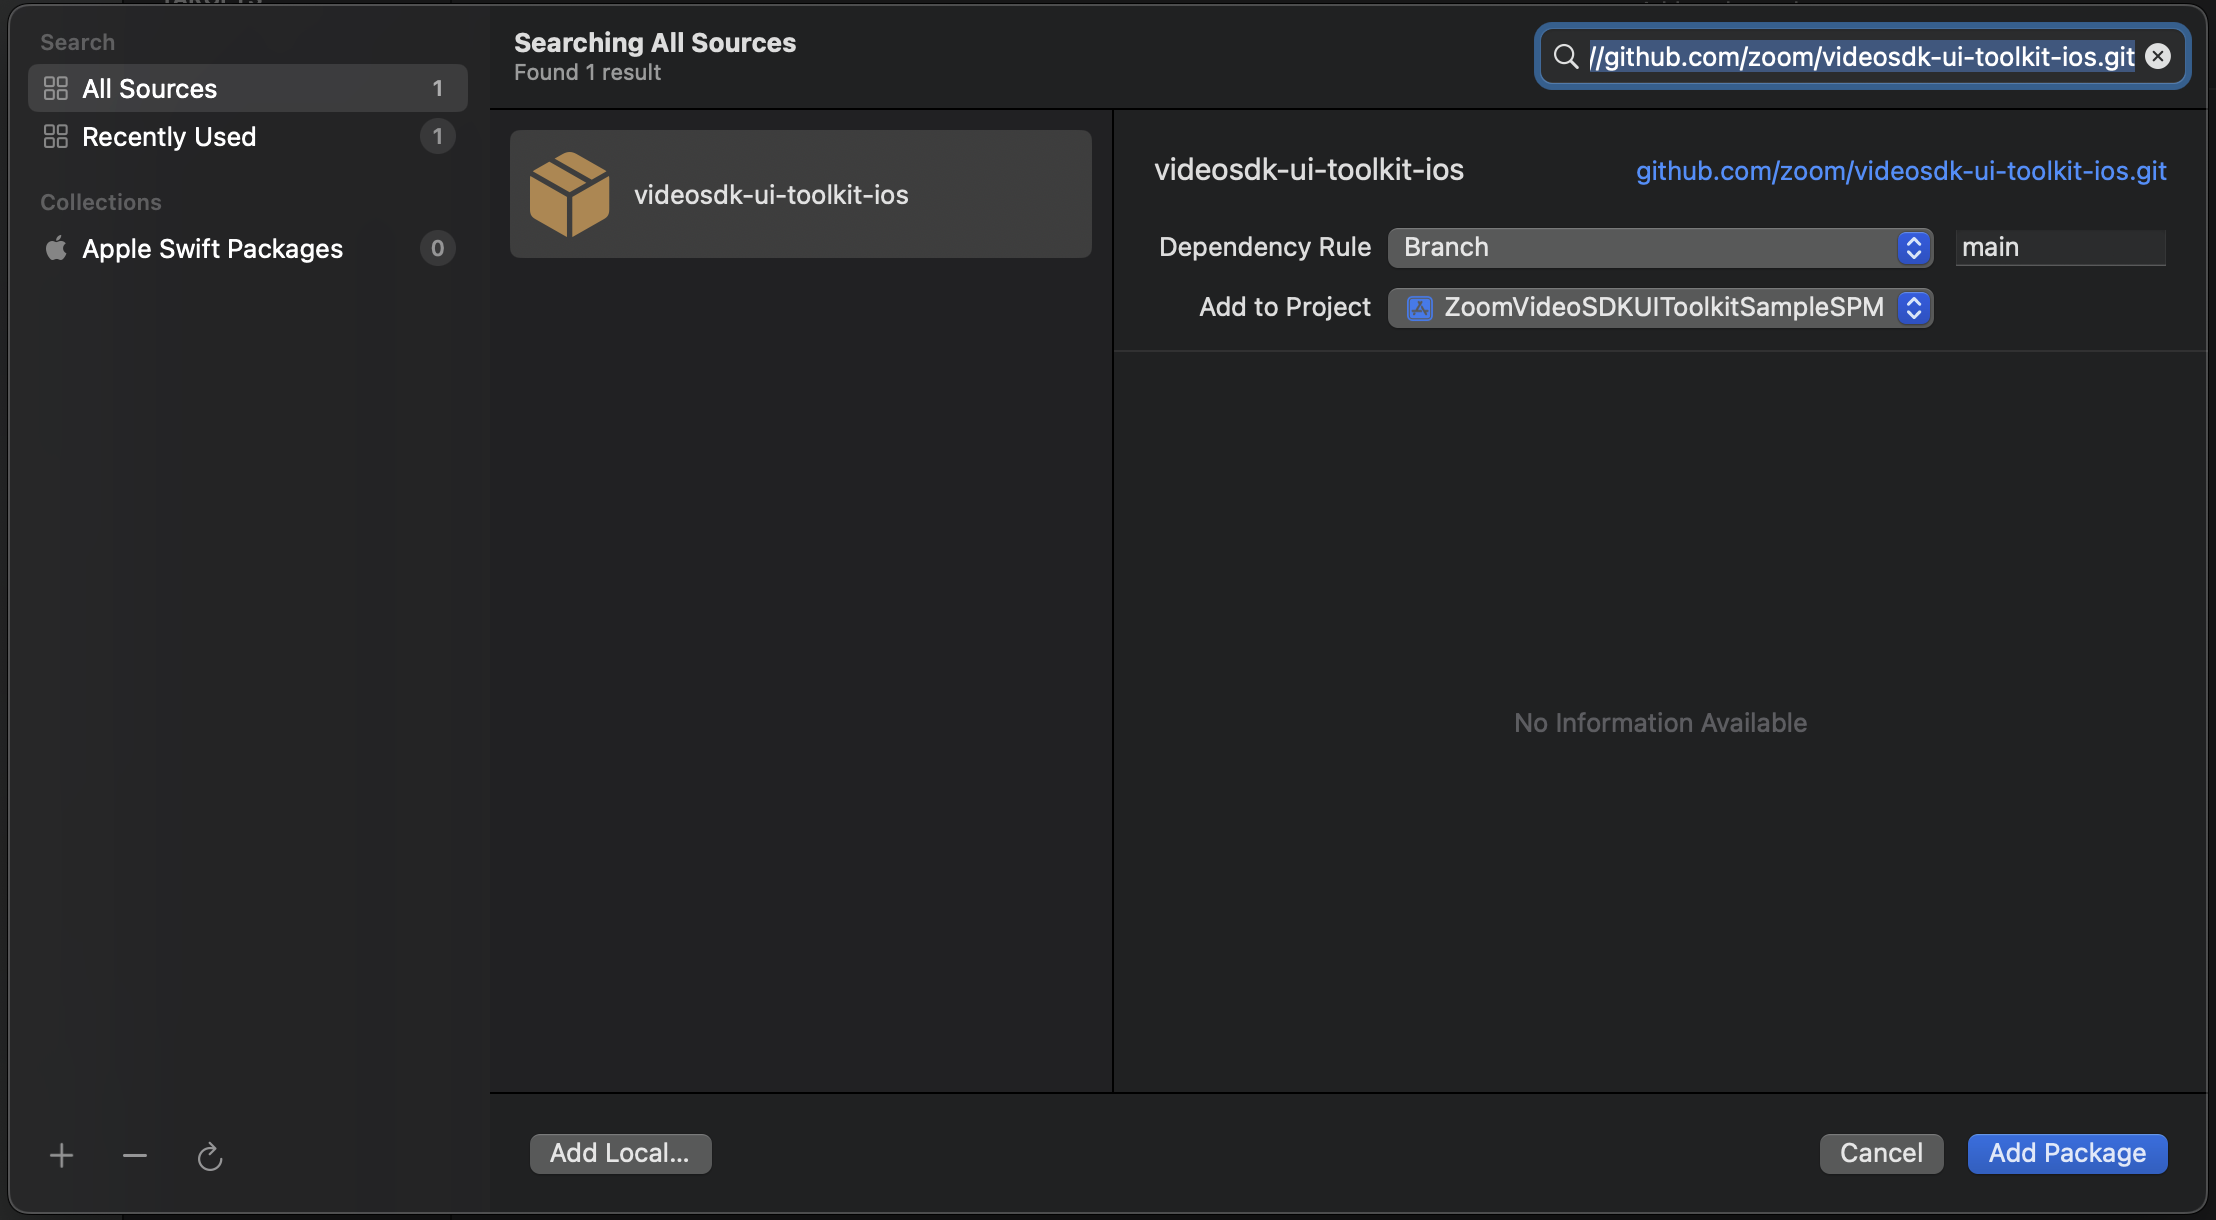
The main branch consists of all 4 xcframeworks (ZoomVideoSDK, ZoomVideoSDKUIToolkit, zoomcml, and CptShare), with all of the available UI Toolkit features. If you don't need the virtual background and screen sharing features, use the essential branch instead of the main branch.
Follow these steps to add the UI toolkit to your app via CocoaPods.
- Create a Podfile with
pod init. - The cocoapod branch consists of all 5
xcframeworks(ZoomVideoSDK,ZoomVideoSDKUIToolkit,ZoomVideoSDKUIToolkitEssential,zoomcml, andCptShare), with all of the available UI Toolkit features.- For all features:
pod 'ZoomVSDKUIToolkitiOS/ZoomVideoSDK' pod 'ZoomVSDKUIToolkitiOS/ZoomVideoSDKUIToolkit' pod 'ZoomVSDKUIToolkitiOS/CptShare' pod 'ZoomVSDKUIToolkitiOS/zoomcml' - For essential features (if you don't need virtual background and screen sharing):
pod 'ZoomVSDKUIToolkitiOS/ZoomVideoSDK'
pod 'ZoomVSDKUIToolkitiOS/ZoomVideoSDKUIToolkitEssential'
- For all features:
- Run
pod installin your directory. - Open the newly-generated
.xcworkspacefile, and your app is good to go.
The version number of the CocoaPod will always correspond to the release number.
Add required app permissions
In order for the camera and mic to work during the session, add the following permissions.
| Permission Required | Optional | Permission Key | Description |
|---|---|---|---|
| Camera | Required | NSCameraUsageDescription | Required for Video |
| Microphone | Required | NSMicrophoneUsageDescription | Required for Audio |
| Bluetooth | Required | NSBluetoothPeripheralUsageDescription | Required for Bluetooth audio devices |
Run
To run the UI Toolkit, get your authorization credentials, create the session context, then create the UI Toolkit view controller and present it. You can also add callbacks with the UIToolkitDelegate class.
Get your authorization credentials
Use your credentials to authorize the SDK so you can create and join sessions. See the Video SDK Auth Endpoint Sample for a sample app that shows how to quickly, easily, and securely generate a Video SDK JWT.
Create the session context
Create the SessionContext that takes in the required authorization parameters such as JWT, session name, and username (display name). If your session requires a password, send it in the the password parameter.
// Session without password
let sessionContext = SessionContext(jwt: String, sessionName: String, username: String)
// If password is required
let sessionContext = SessionContext(jwt:String, sessionName: String, sessionPassword: String?, username: String)
// Session without password
SessionContextObjC *sessionContext = [[SessionContextObjC alloc] initWithJwt:@"jwt" sessionName:@"session" username:@"name"];
// If password is required
SessionContextObjC *sessionContext = [[SessionContextObjC alloc] initWithJwt:@"jwt" sessionName:@"session" sessionPassword:@"password optional" username:@"name"];
Create the init param (optional)
Create InitParams in the following cases.
- If your session allows screen sharing, you must also add your App Group ID to the
appGroupIdparameter. - To limit features. By default, the UI Toolkit comes with all available features. However, some may require an additional license such as Cloud Recording. If you would like to limit the available features to best suit your scenarios, add the features you want to the features parameter.
- Consent messages are sent by default for the following features, but you can customize them.
- For cloud recording, add a customized consent message to the
recordingConsentMessageparameter. - For live streaming, add a customized consent message to the
liveStreamConsentMessageparameter. - For live transcription and translation, add a customized consent message to the
lttConsentMessageparameter.
- For cloud recording, add a customized consent message to the
See Customized consent messages for examples.
Add features
features[] | Description |
|---|---|
Video | Shows the video button on the toolbar and enables sending of video. Receiving of video by others is not affected by this. |
Audio | Shows the audio button on the toolbar and enables sending audio. Receiving of audio by others is not affected by this. |
ShareScreen | Shows the screen share button on the toolbar and enables sending screen share content. Receiving of sharing by others is not affected by this. This requires the main and not essential frameworks. |
Users | Shows the user's button on the toolbar and enables users to see the list of users in the session. |
Chat | Shows the chat button under the "More" button and enables sending and receiving session chats. |
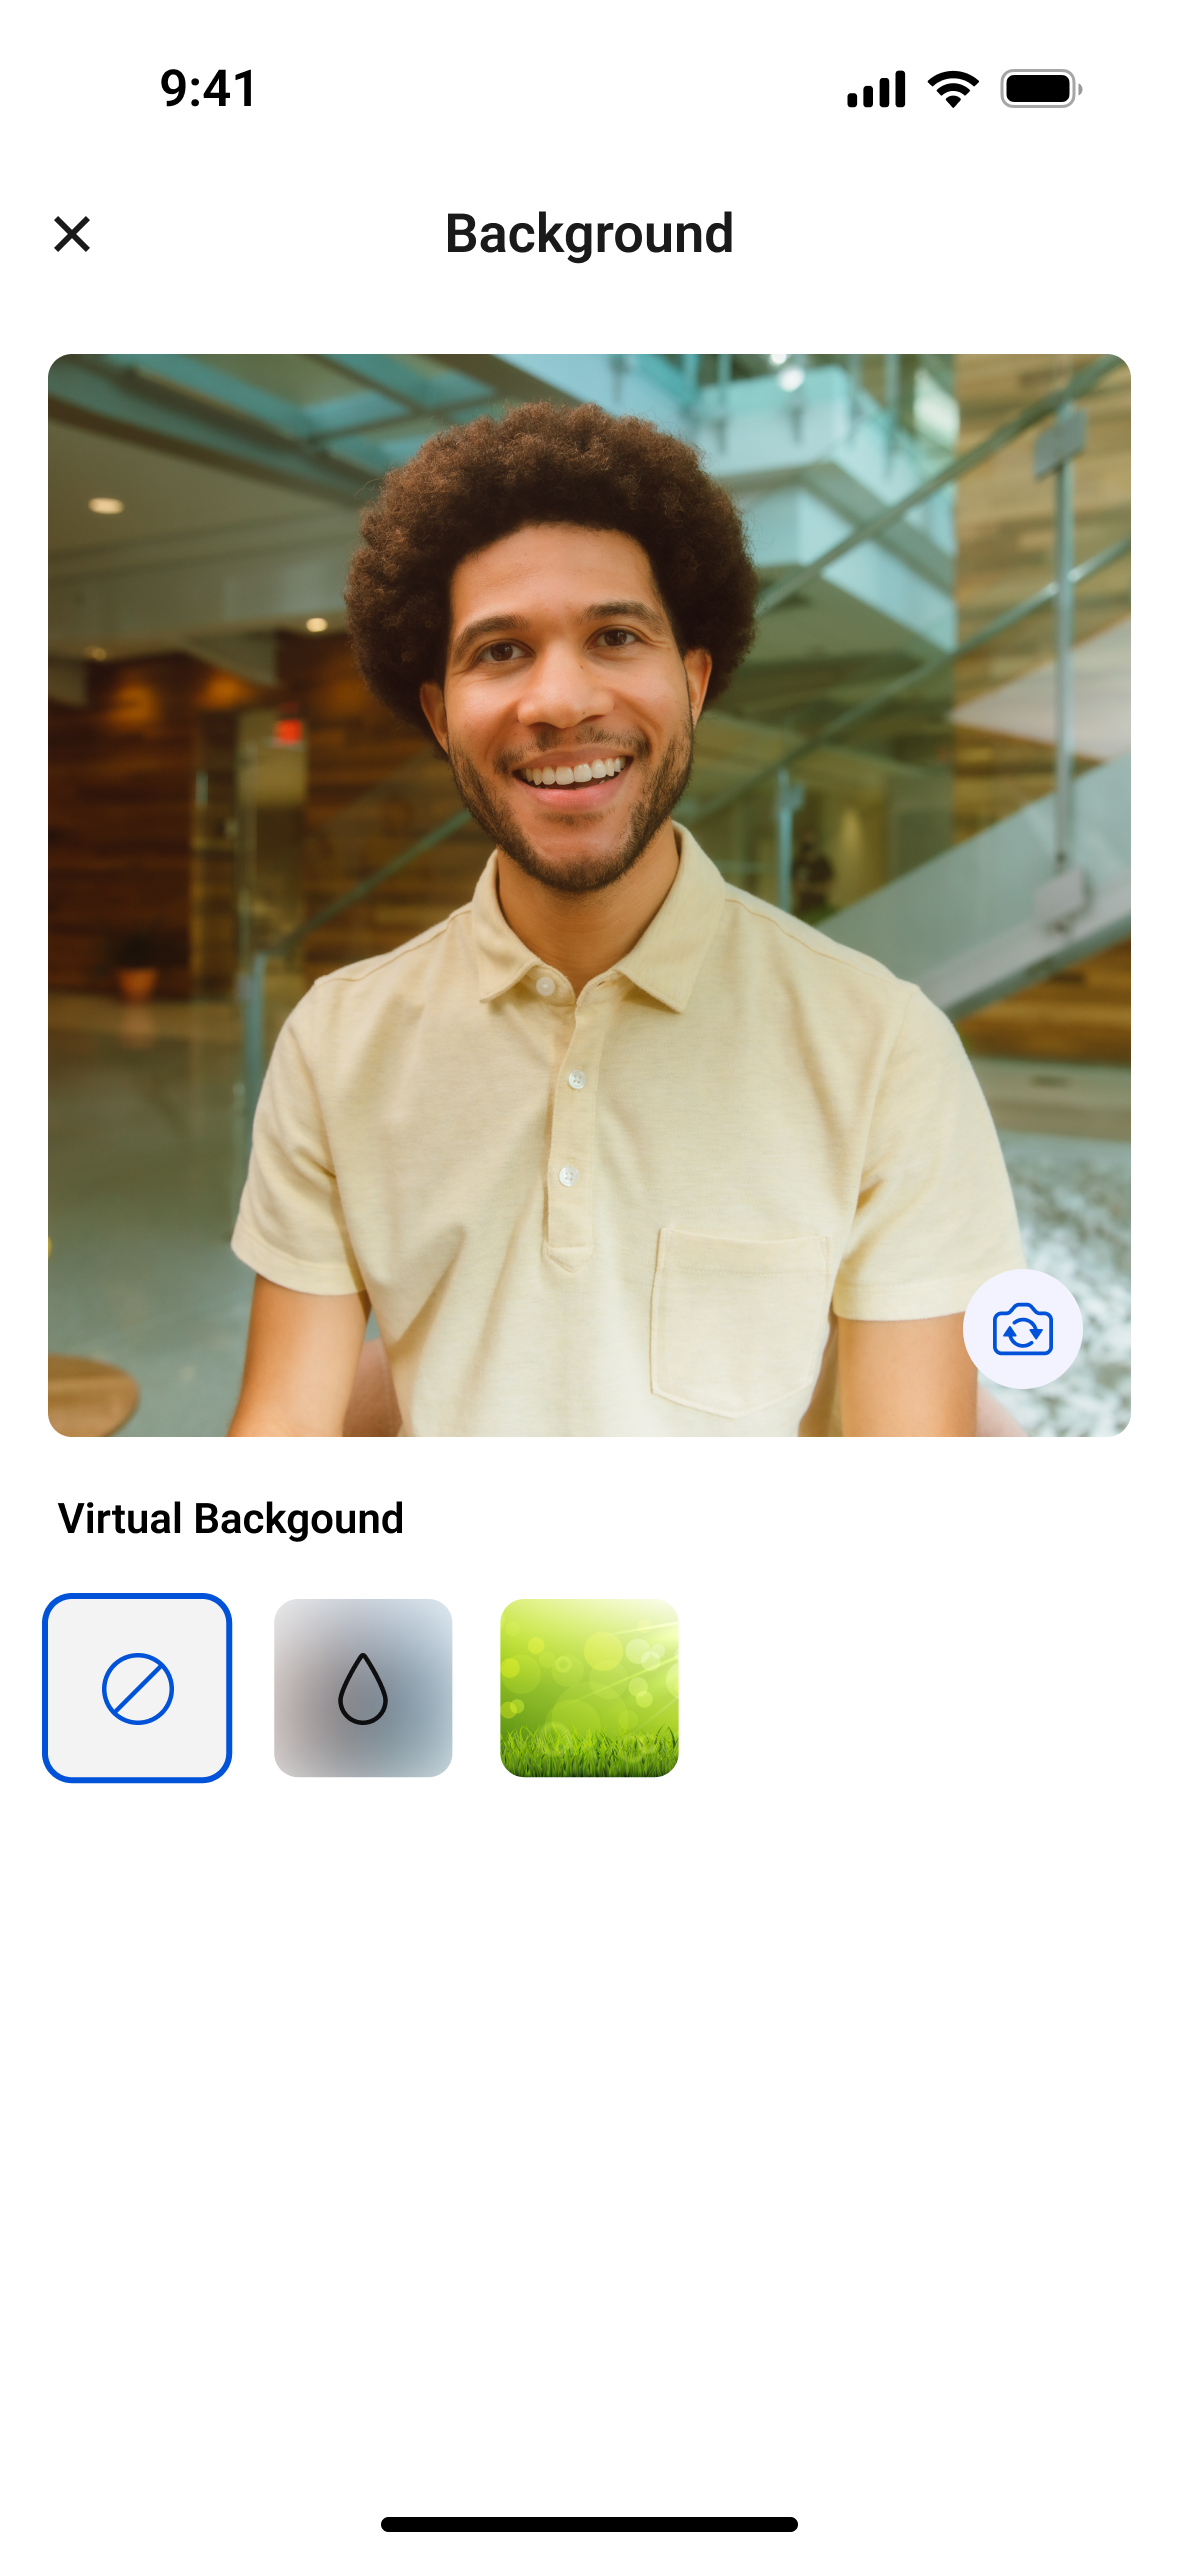
VirtualBackground | Shows the virtual background button under the "More" button and enables user to either blur their background or no background. This requires the main and not essential frameworks. |
LiveStreaming | Shows the live streaming button under the "More" button and enables the user to either start or stop live streaming. See Live streaming for details. |
LTT | Shows the live transcription and translation button under the "More" buttons and enables user to either start or stop live transcription and translation. See Live transcription and translation for details. |
CloudRecording | Shows the cloud recording button under the "More" button and enables user to either start, pause or stop recording. This requires additional license and also the main and not essential frameworks. |
Settings | Shows the settings button under the "More" button and enables changing of the local user's name, the ability to see session information and quality statistics. If the local user is the host or manager, they will also be able to turn on or turn off certain features. |
Here's an example.
// To limit users to Audio, Video, Screen Share and chat features
let initParams = InitParams(appGroupId: appGroupID, features: [.Audio, .Video, .ShareScreen, .Chat]
// To limit users to Audio, Video, Screen Share and chat features
InitParamsObjC *initParams = [[InitParamsObjC alloc] initWithAppGroupId:@"AppGroupId" features:@[.Video, .Audio, .ShareScreen, .Chat]];
Customized consent messages
Here are some examples of how to add features with customized consent messages.
// To add a consent message if you use cloud recording
InitParams(appGroupId: appGroupID, features: [.Audio, .Video, .ShareScreen, .Chat], recordingConsentMessage: recordingConsentMessage, liveStreamConsentMessage: liveStreamingConsentMessage, lttConsentMessage: lttConsentMessage)
// To add a consent message if you use cloud recording
InitParamsObjC *initParams = [[InitParamsObjC alloc] initWithAppGroupId:@"AppGroupId" features:@[.Video, .Audio, .ShareScreen, .Chat] recordingConsentMessage: recordingConsentMessage, liveStreamConsentMessage: liveStreamingConsentMessage, lttConsentMessage: lttConsentMessage];
Use default or component view
Build with the UI Toolkit using default or component view.
- Default view - A pre-built video chat experience constructed from components. This enables you to quickly build a complete solution that easily enhances your application with a comprehensive video chat experience.
- Component view - Building blocks that let you build a custom communications experience without having to start from scratch. You can control the positioning and layout of these components however you choose.
Click the Default or Component tab to learn how to build the Toolkit. Since the default view is the simplest way to get started, it's shown first.
Create the UI Toolkit view controller and present it
Create the UIToolkitVC that takes in the sessionContext and presents it.
let vc = UIToolkitVC(sessionContext: sessionContext, initParams: initParams)
vc.delegate = self
vc.modalPresentationStyle = .fullScreen
present(toolkitVC, animated: true)
UIToolkitVC *vc = [[UIToolkitVC alloc] initWithSessionContextObject:sessionContext initParams:initParams];
vc.delegate = self;
vc.modalPresentationStyle = UIModalPresentationFullScreen;
[self present view controller:vc animated:YES completion:nil];
Add callbacks with UIToolkitDelegate
Extend your view controller with the UIToolkitDelegate class, which consists of important callbacks such as if any errors were returned or when the view is loaded or dismissed.
extension ViewController: UIToolkitDelegate {
    func onError(_ errorType: UIToolkitError) {
        print("Sample VC onError Callback: \(errorType.rawValue) -> \(errorType.description)")
    }
    func onViewLoaded() {
        print("Sample VC onViewLoaded")
    }
    func onViewDismissed() {
        print("Sample VC onViewDismissed")
    }
}
@interface ViewController () <UIToolkitDelegate>
@end
@implementation ViewController
- (void)onError:(UIToolkitError)errorType {
 NSLog(@"Sample VC onError Callback: %@ -> %@", @(errorType), errorType.description);
}
- (void)onViewLoaded {
 NSLog(@"Sample VC onViewLoaded");
}
- (void)onViewDismissed {
 NSLog(@"Sample VC onViewDismissed");
}
@end
Choose components
Choose which components to use. The table shows the components you can use.
| Component | Image and description |
|---|---|
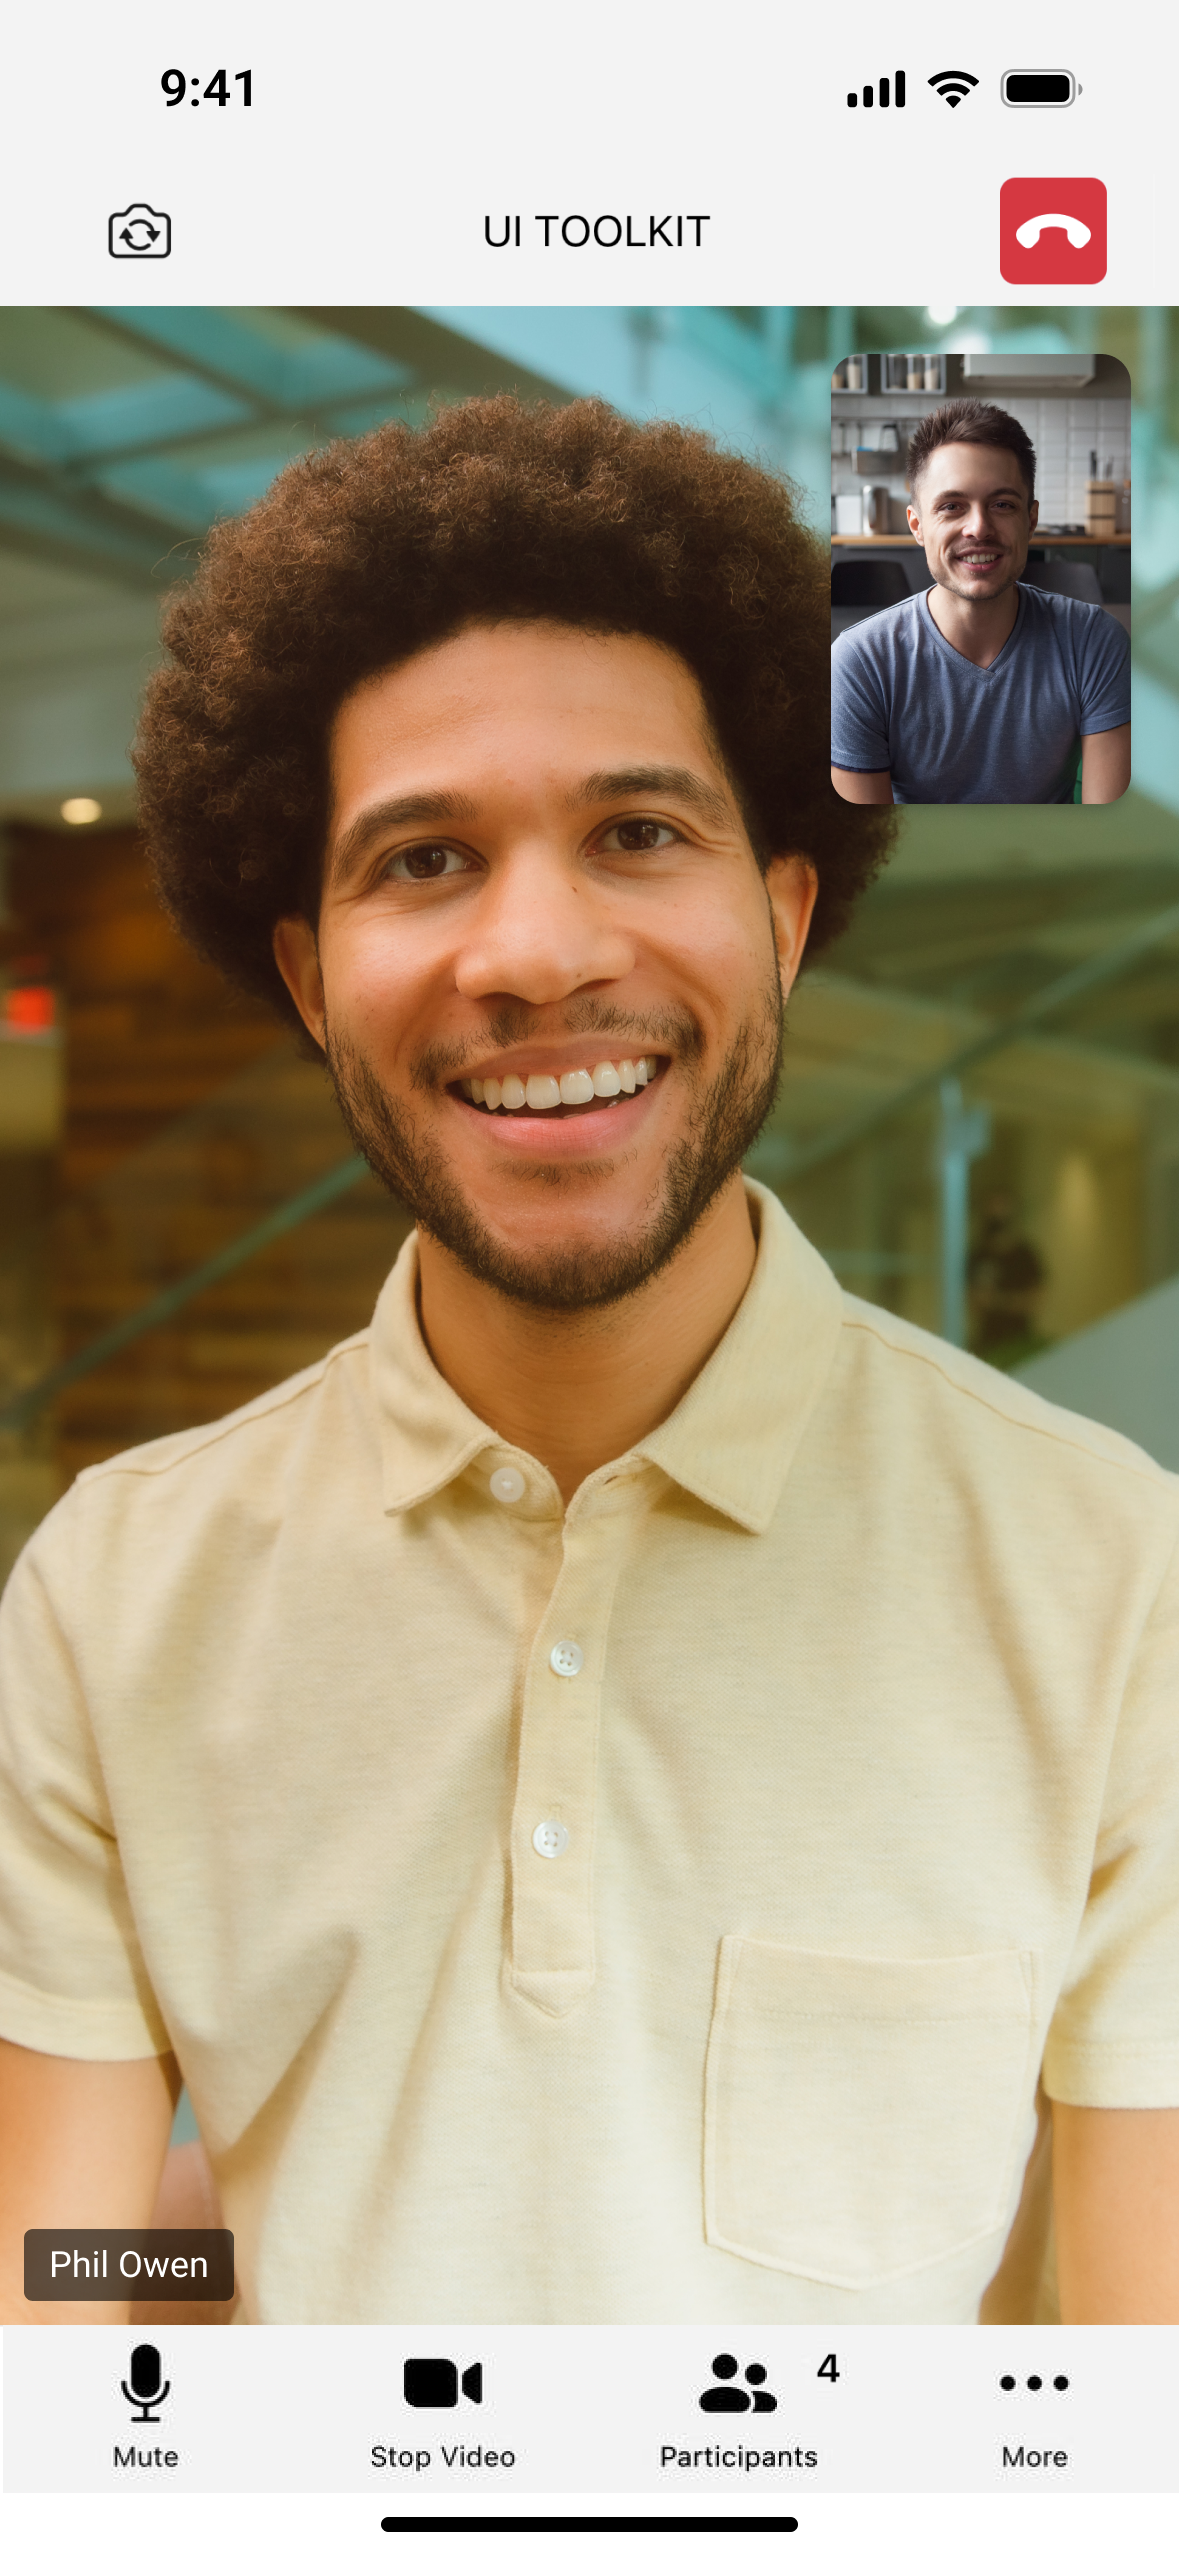
TitleNavBar |  Enables users to invoke actions such as muting, starting video, screen sharing, viewing the users list and more. |
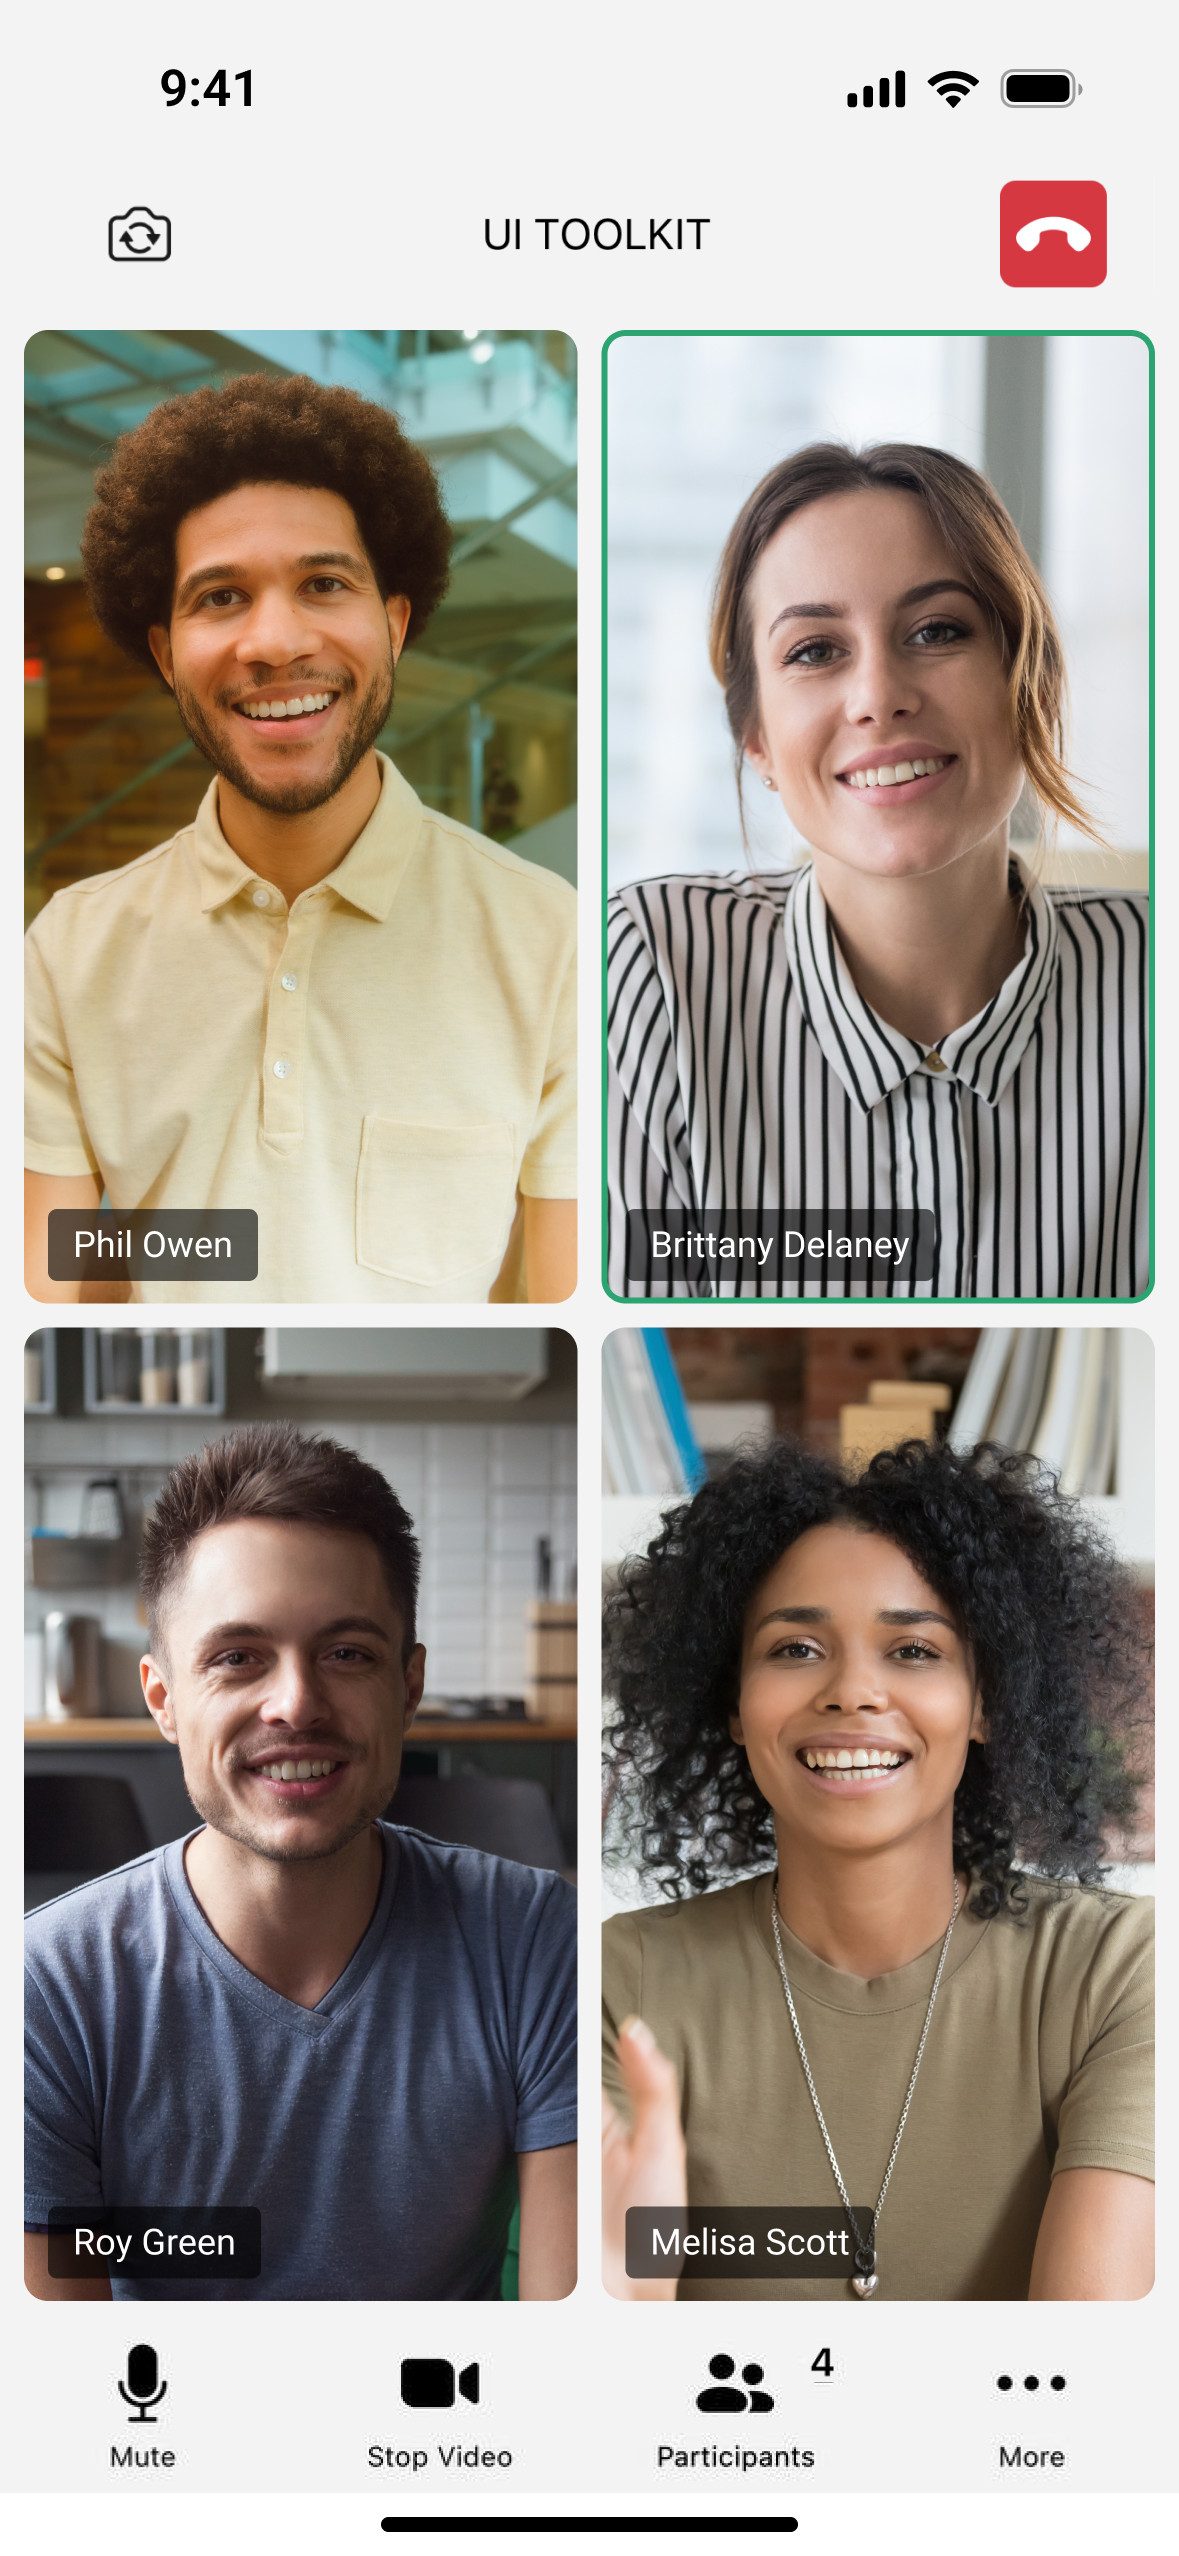
ActiveSpeakerGalleryView | Displays user videos and screen sharing. |
CTANavBar | 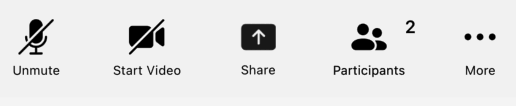 Call to action (CTA). Enable users to toggle their camera, view the session's title and leave/end the session. |
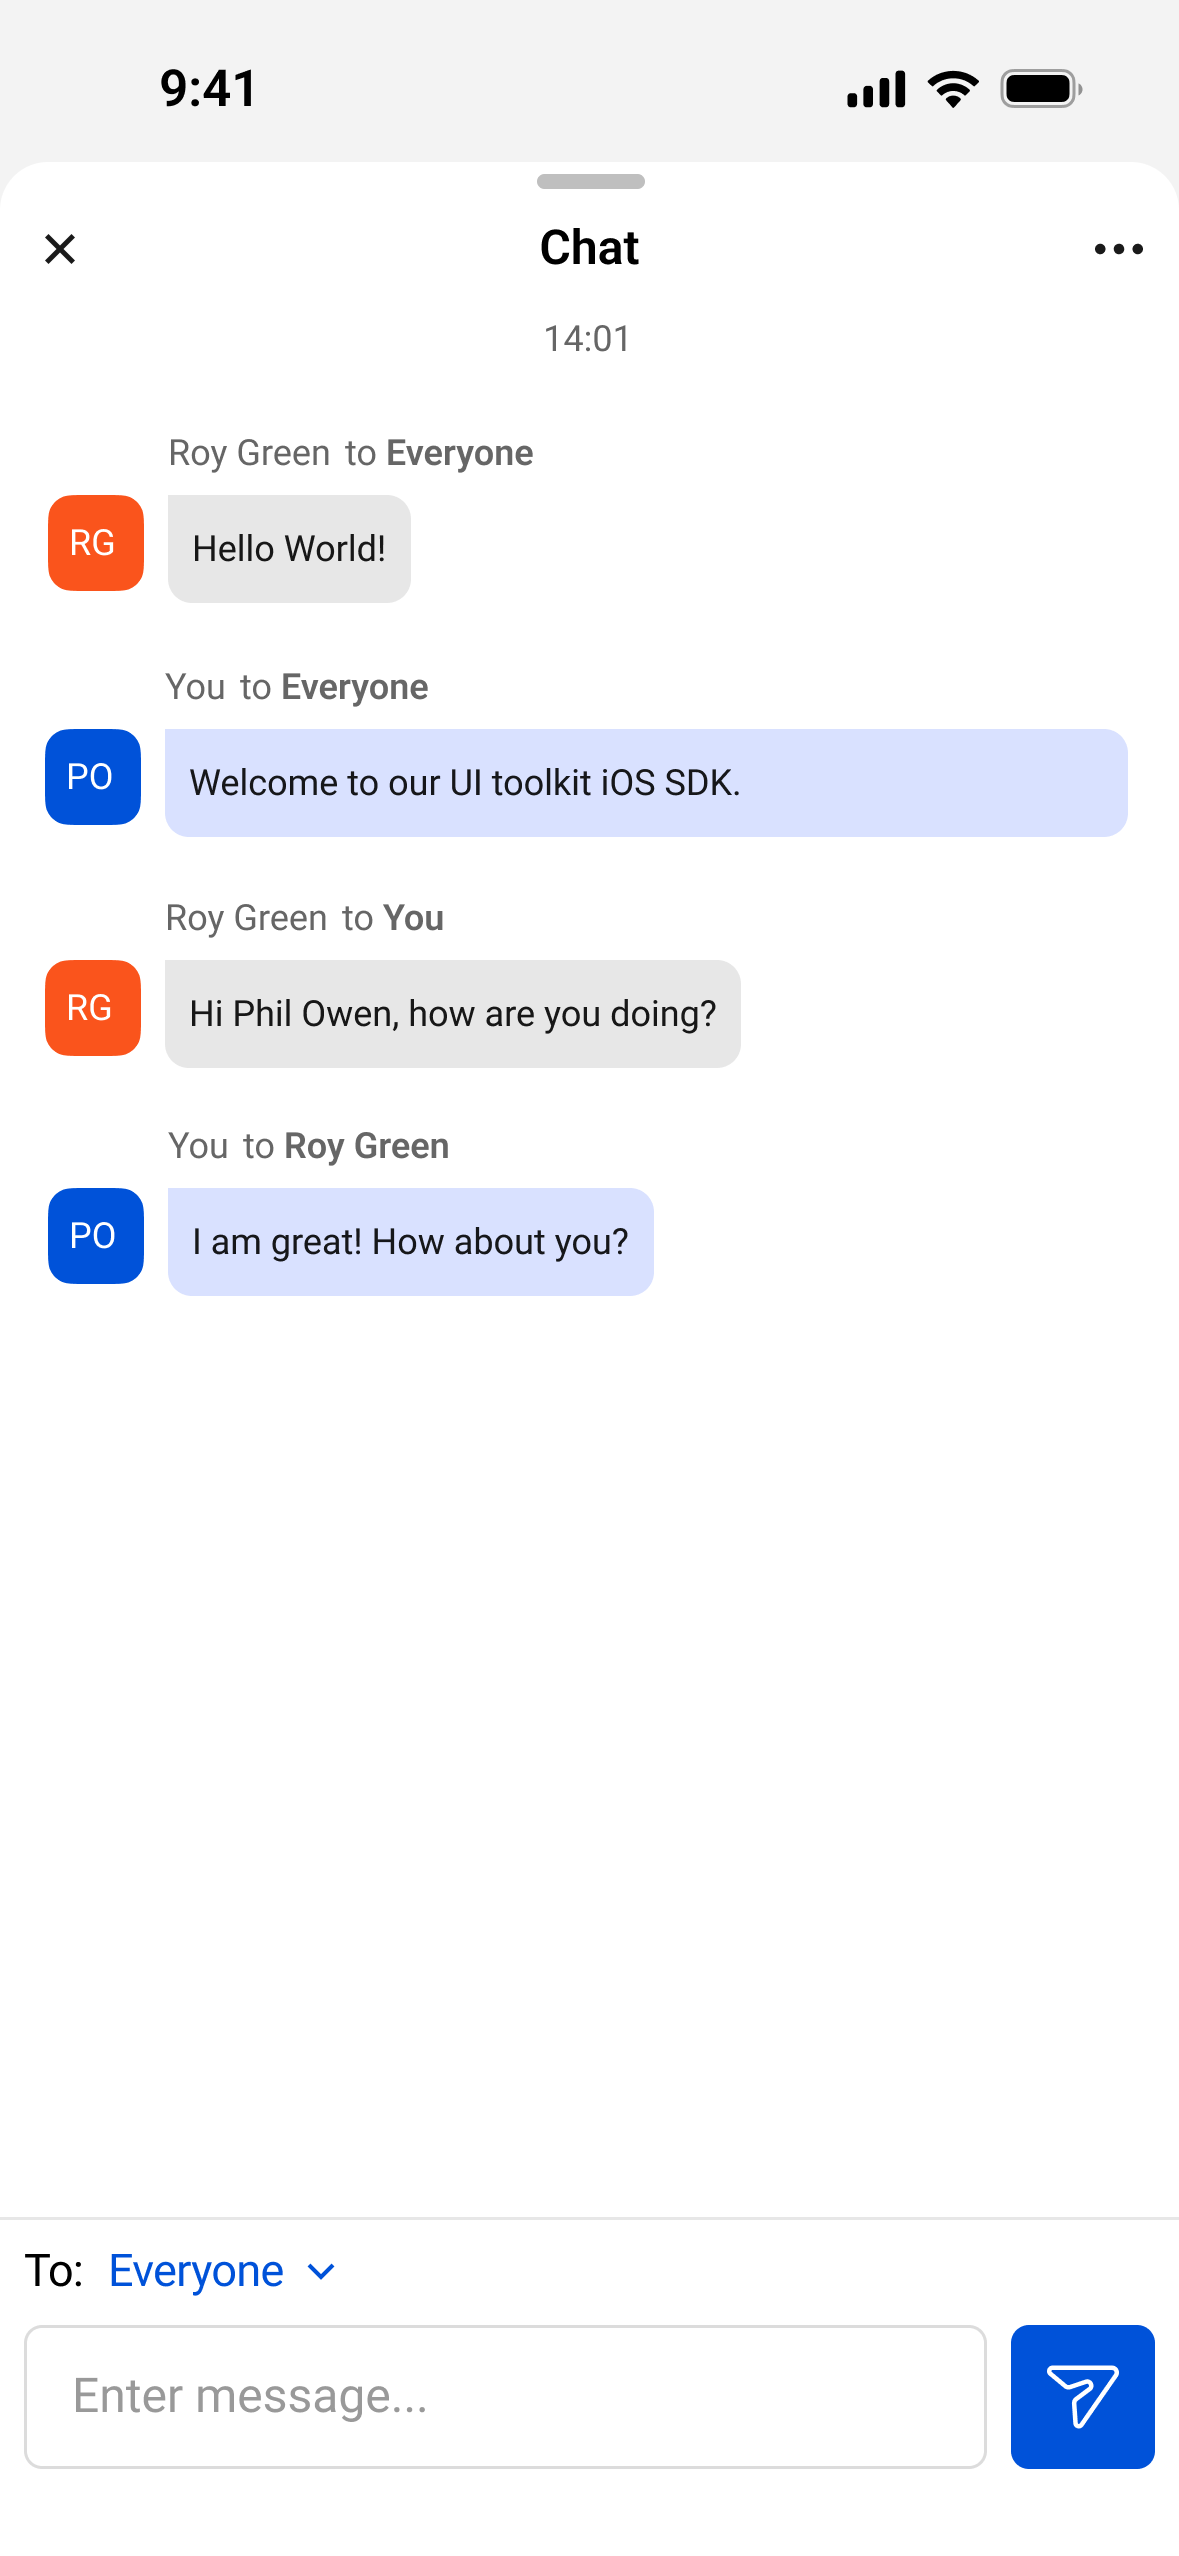
Chat | Displays in session chat for group and private messaging. |
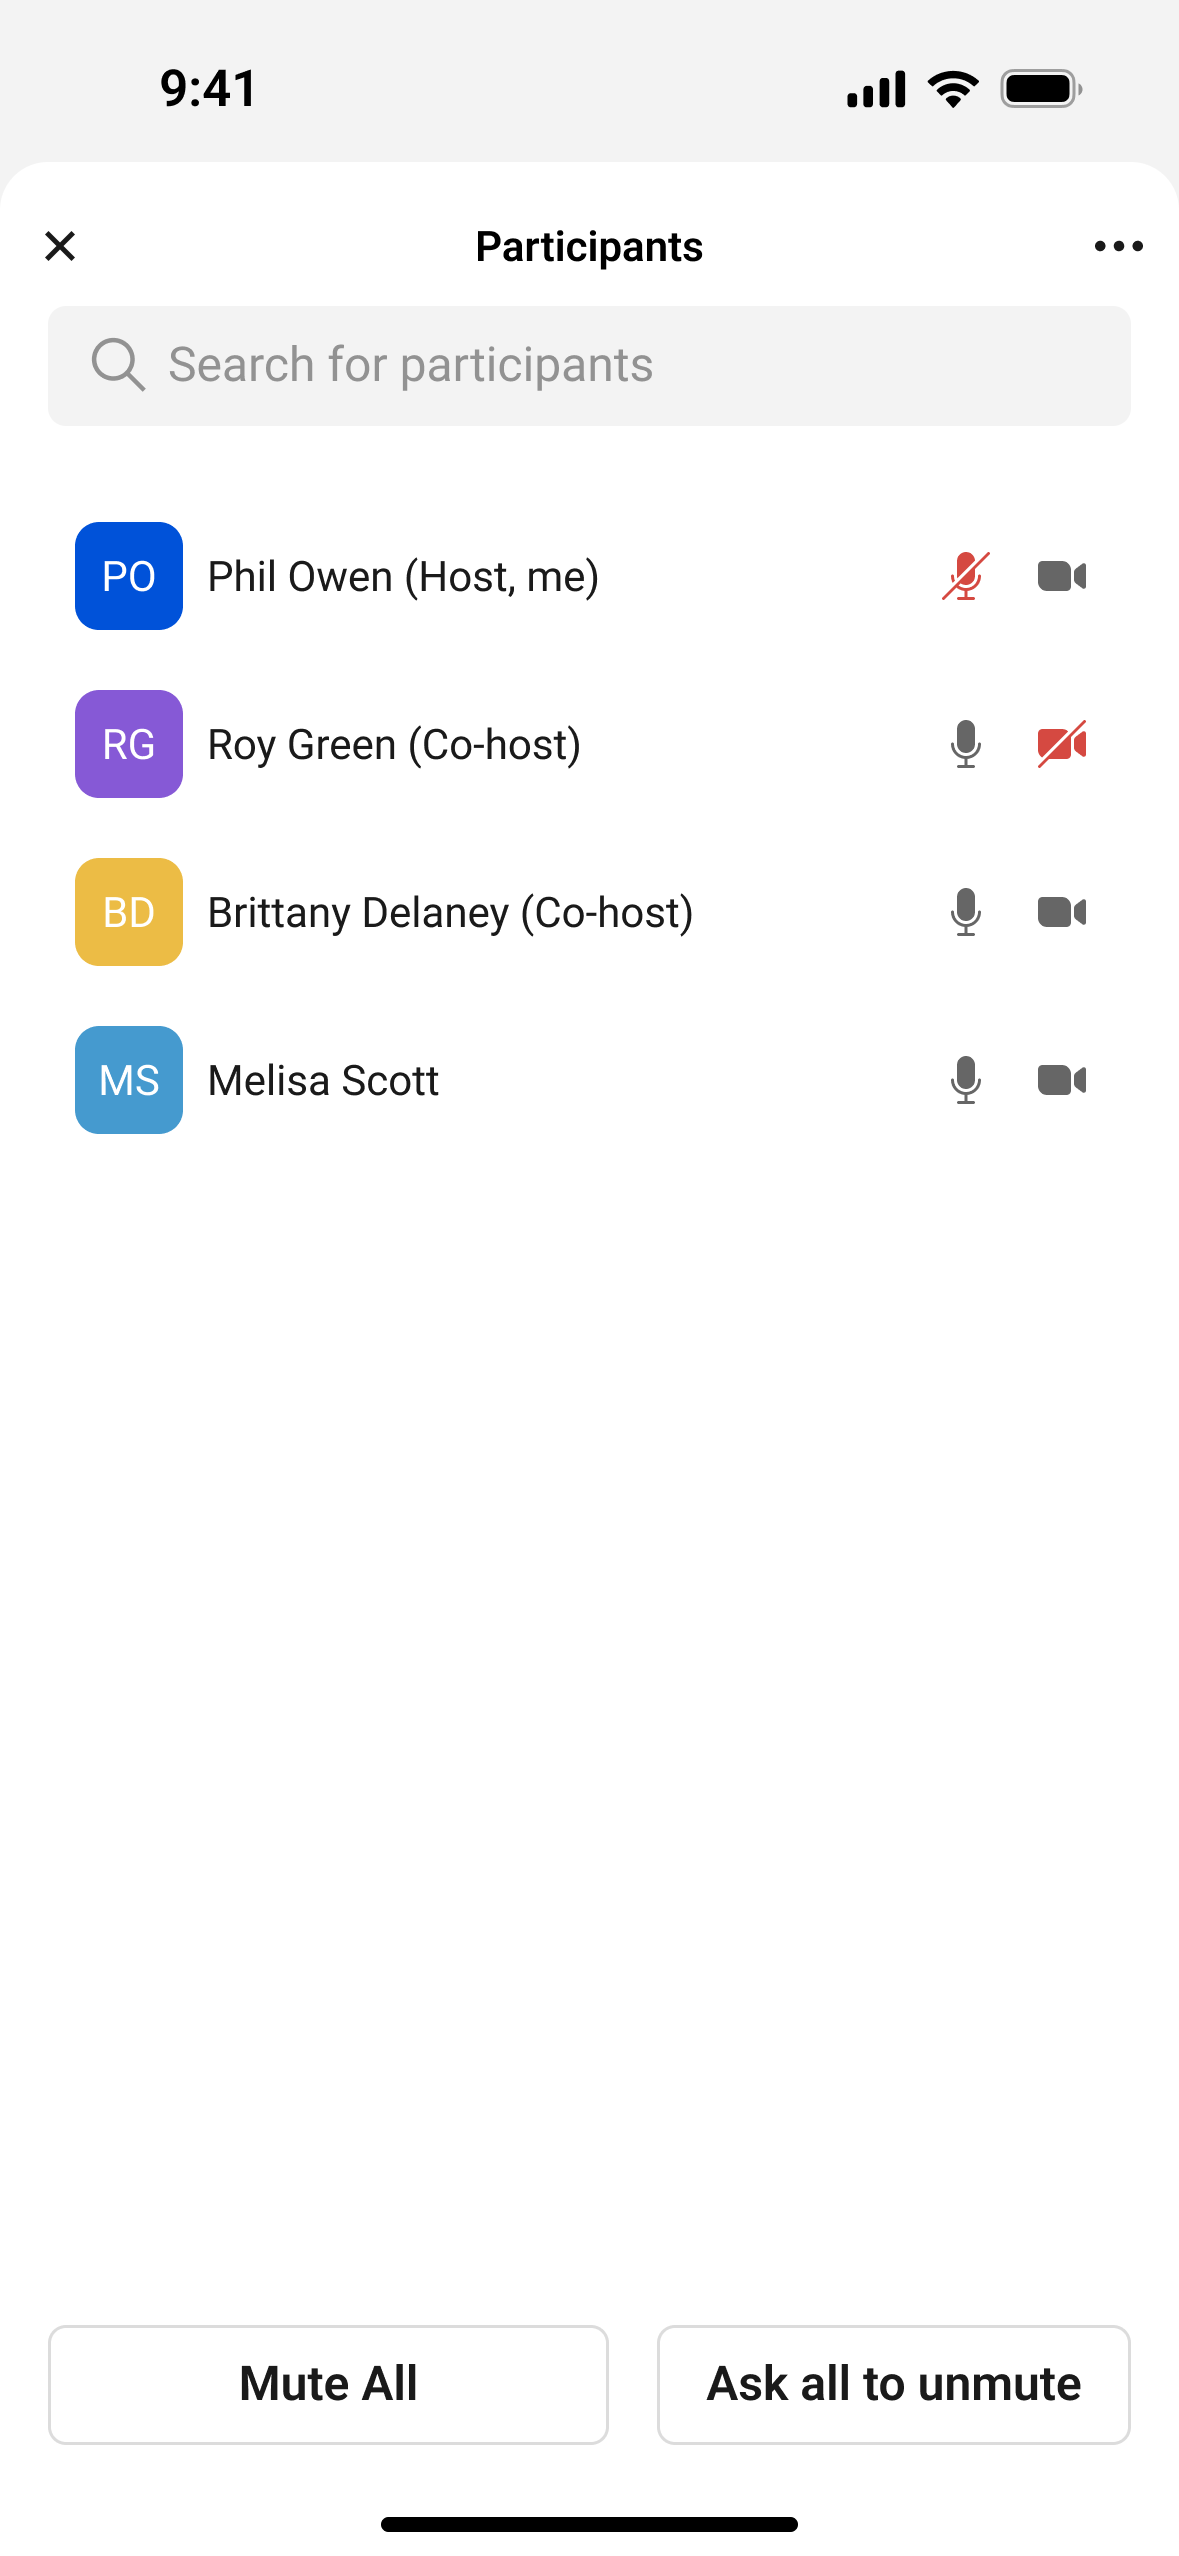
Participants | Displays the list of users in a session and allows hosts and manager to moderate the session. |
Settings | 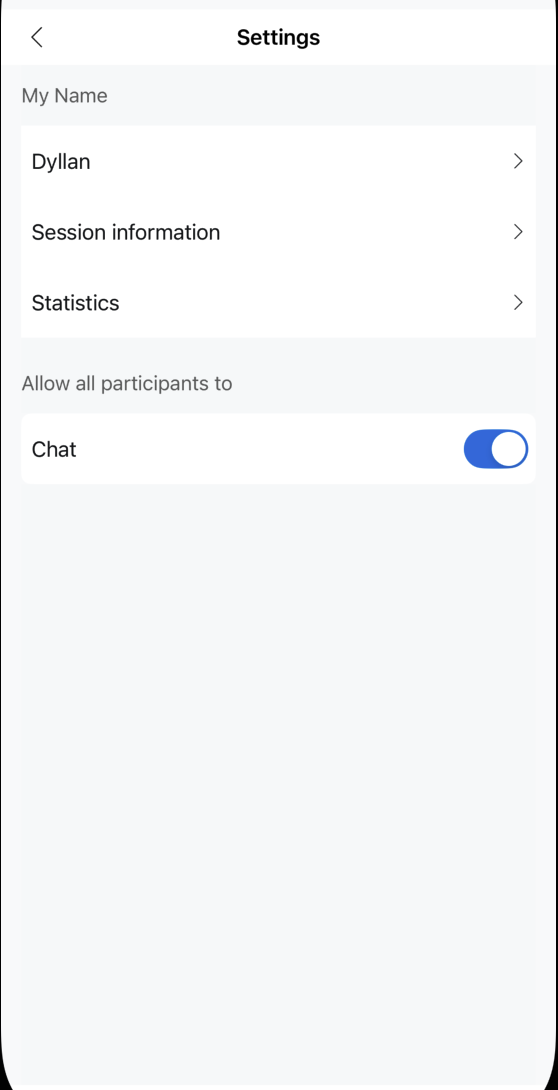 Displays the session settings and allows users to configure their audio devices, and see session information and quality statistics. If the user is a host or manager, they can turn features on/off. |
Initialize title navigation bar, active speaker, and gallery view
You must initialize the title navigation bar, active speaker, gallery view, and CTA navigation bar in a view of your choice. Then use fitLayoutTo to fit these components to the entire view they're assigned to. Then set up the components.
// Title Navigation Bar
let titleBarComponent = TitleNavBar()
viewOfYourChoice.addSubview(titleBarComponent)
titleBarComponent.fitLayoutTo(view: viewOfYourChoice)
UIToolkitComponentManager.shared().setTitleBar(with: titleBarComponent)
// Active speaker and gallery view
let activeSpeakerGalleryComponent = ActiveSpeakerGalleryView()
viewOfYourChoice.addSubview(activeSpeakerGalleryComponent)
activeSpeakerGalleryComponent.fitLayoutTo(view: viewOfYourChoice)
UIToolkitComponentManager.shared().setActiveSpeakerGalleryView(with: activeSpeakerGalleryComponent)
// CTA Navigation Bar
let ctaBarComponent = CTANavBar()
viewOfYourChoice.addSubview(ctaBarComponent)
ctaBarComponent.fitLayoutTo(view: viewOfYourChoice)
UIToolkitComponentManager.shared().setCTABar(with: ctaBarComponent)
Add chat, users, and settings view
The chat, users and settings views should take up the full screen of the iOS device, otherwise it may not look as great. Use the respective push view method to navigate a push into the respective view or if you wish to add it within the same view controller you can also call the respective add view to add it into your view of choice.
// Chat view - Add it into your view of choice.
UIToolkitComponentManager.shared().addChatView(to: self, view: viewOfYourChoice)
// Chat view - Push the entire chat view
UIToolkitComponentManager.shared().pushChatView()
// Users view - Add it into your view of choice.
UIToolkitComponentManager.shared().addParticipantsView(to: self, view: viewOfYourChoice)
// Users view - Push the entire users view
UIToolkitComponentManager.shared().pushParticipantsView()
// Settings view - Add it into your view of choice.
UIToolkitComponentManager.shared().addSettingsView(to: self, view: viewOfYourChoice)
// Settings view - Push the entire settings view
UIToolkitComponentManager.shared().pushSettingsView()
Add callbacks with UIToolkitDelegate
Extend your view controller with the UIToolkitDelegate class, which consists of important callbacks such as if any errors were returned or when the local user successfully starts, joins, or leaves the session.
extension ViewController: UIToolkitDelegate {
    func onError(_ errorType: UIToolkitError) {
        print("Sample VC onError Callback: \(errorType.rawValue) -> \(errorType.description)")
    }
    func startJoinSessionSuccessed() {
        print("Sample VC Start/Join Session Successfully")
    }
    func leaveSession(reason: ZoomVideoSDKSessionLeaveReason) {
        print("Sample VC Left Session, reason: \(reason)")
    }
    func chatPermissionChanged(enable: Bool) {
        print("Sample VC chatPermissionChanged: \(enable)")
    }
}
Reference
- See the UI Toolkit reference documentation for details on classes, protocols, structures, and enumerations.
- See error codes for error code details.
- See the changelog for release notes.
- See Video SDK Plans & Pricing for Developer for pricing.