Try the demo app
Now that you've downloaded and set up the sample app, it's time to bring it to life.
Build and run the demo
Build the default SDK for Windows demo app.
- Open the demo app in your IDE of choice.
- In Visual Studio, go to the
demofolder. - Open the
sdk_demo.vcxprojfile.
- In Visual Studio, go to the
- Set your build configuration. In Visual Studio, set the Solution Configuration to Release.
- Define your architecture. In Visual Studio, set the Solution Platform to either X86 (for 32-bit systems) or X64 (for 64-bit systems).
- Build and run.
Build the default SDK for Windows demo app with the C# wrapper.
- Open the demo app in your IDE of choice.
- In Visual Studio, go to the
zoom_sdk_demofolder. - Open the
zoom_sdk_demo.csprojfile.
- In Visual Studio, go to the
- Set your build configuration version. For example, in Visual Studio, set the Solution Configuration to Release.
- Define your architecture. In Visual Studio, set the Solution Platform to either X86 (for 32-bit systems) or X64 (for 64-bit systems).
- Build and run.
Play with the app
Now let's play around with the demo application.
Launch the app from your IDE to open the demo app. In Visual Studio, press Local Windows Debugger. When you launch the demo app, it opens a series of screens asking for some information. Depending on which wrapper you're using, these screens will be different.
For this part, you'll need a meeting ID number and meeting passcode from a pre-created Zoom meeting.
-
On the first dialog, when asked to enter a domain, enter
https://zoom.usand press SetDomain.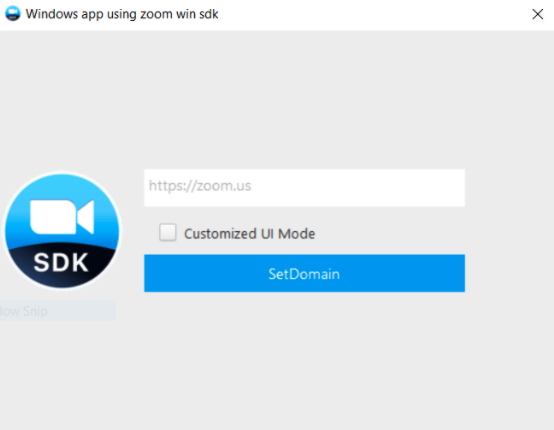
Do not use a raw IP address as the web domain. That exposes your app to vulnerability issues. To learn more, see our security practices.
-
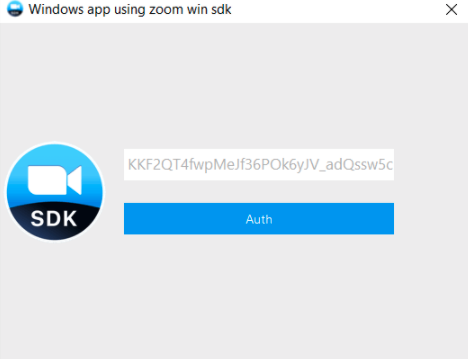
On the next dialog, enter your JWT token and press Auth.
-
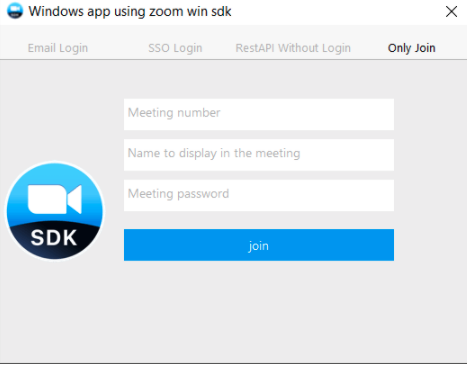
On the final dialog, go to the Only Join tab and enter your meeting number, your display name for the meeting, and the meeting password. Then press Join.
If all went well, you'll see the meeting window.
-
On the first dialog, when asked to enter your App Token, enter your JWT token.
-
On the second dialog, enter a UserName, UserID (email), your ZAK Access Token, and the Meeting Number.
-
Select Start.
If all went well, you'll see the meeting window.
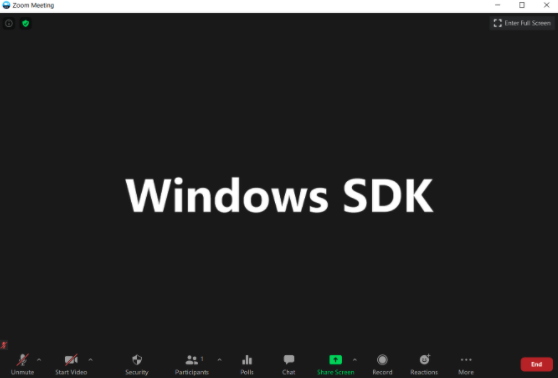
Congratulations! You have set up, built, and run the demo app and used it to join a pre-existing Zoom meeting. Explore all the features of our Meeting SDK, such as Share, Chat, Record, or Closed Caption.
This is what the Meeting SDK for Windows looks like in a Windows application.